Installing PHP onto your NginX server

Our web server is currently pretty useless at the moment so let’s make it a bit more useful.

Enter the following command into your terminal.

sudo apt-get install php7.3-fpm php7.3-mysql php7.3-xmlrpc php7.3-curl php7.3-gd php-imagick php7.3-imap -y

Now we need to enable php in NginX. To do so we need to make some changes to the NginX settings, Type the following command into your terminal to edit the settings file.

sudo nano /etc/nginx/sites-available/default

Find the line that contains the following

index index.html index.htm index.nginx-debian.html;

Edit the line so it looks like this

index index.php index.html index.htm;

Now scroll down to find the section that begins with something like this

# pass the PHP scripts to FastCGI server listening on 127.0.0.1:9000
#
# location ~ \.php$ {

Edit the section so it looks like this

# pass PHP scripts to FastCGI server
#
location ~ \.php$ {
        include snippets/fastcgi-php.conf;

#       # With php-fpm (or other unix sockets):
        fastcgi_pass unix:/var/run/php/php7.3-fpm.sock;
        fastcgi_split_path_info ^(.+\.php)(/.+)$;
#       # With php-cgi (or other tcp sockets):
#       fastcgi_pass 127.0.0.1:9000;
}

Now you can save the config file (ctrl-s ctrl-x) and tell NginX to reload it with the following command

sudo service nginx reload

You should now create a simple PHP file to check if the setup is working correctly. To do this, type in the following command.

sudo nano /var/www/html/index.php

You need to now add the following code to your newly created file:-

<?php phpinfo(); ?>

Now save the file (ctrl-s ctrl-x)

Finally, you can now view your dynamically created web page by entering the IP address of your server (the one you noted when you installed NginX) into your browser. If you have forgotten it, you can enter the command

ifconfig

again and locate the IP address on the line that starts with inet. The IP address should start with 192.168. Entering this IP address should now show you a page something like this.
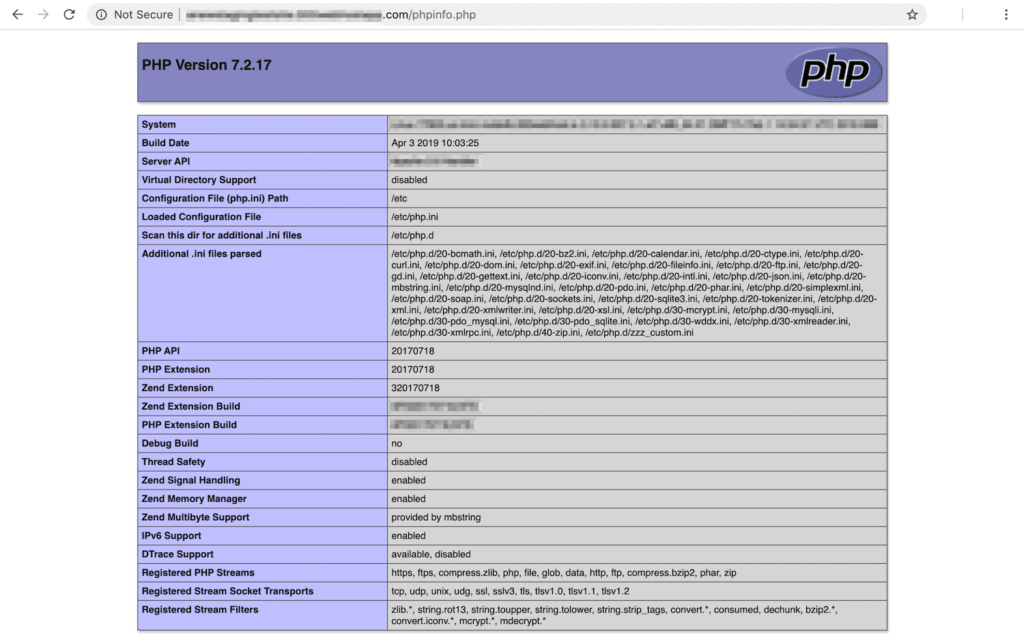
This shows PHP is installed correctly

Prev < Build a Raspberry-Pi Webserver

Build a Raspberry Pi Web Server

So you’ve bought a Raspberry Pi and you are now struggling to find something to do with it after learning how to flash the
LEDs.

How about building a home web server to run one or more websites. It’s not as difficult as it sounds and is a great learning
process.

This site and others are being hosted on a Raspberry Pi 3B+ running WordPress on an NginX web server.

The first thing you will need is to do is install Raspberry Pi OS onto your SD card (I use Debian). Full instructions can be found on the official Raspberry Pi OS Downloads page.

Install NginX

Let’s begin by installing & setting up our web server. For this I will be using NginX (pronounced Engine-X) Open Source as the server (you could use another server such as Apache but I think NginXis better suited to the RPi). NginX can serve HTML pages over HTTP but we’re more interested in the dynamic content served up by WordPress via the PHP scripting language (more of this later).

Right so to install NginX onto your RPi enter the following command on your RPi Terminal.

sudo spt-get istall nginx

Now we start the server with the command

sudo service nginx start

You can now test your server by entering the IP address into a web browser. The IP address of my server is http://192.168.0.32, to find the IP address of your server, enter the following command into your terminal.

ifconfig

You will be presented with 1 or more blocks of text. Find the line that starts eth0: This is your ethernet connection and will contain a line beginning inet, this is your IP address and should start 192.168, Make a note of this address as you will need it again later.

When you enter your IP address into the browser you should see the following page.

Configuring NginX

With our server up and running, we need to do some configuration to optimise the server’s performance.

First lets open up the configuration file using the following command in the terminal.

sudo nano /etc/nginx/nginx.conf

Any line in this file beginning with a ‘#’ is commented out. When you see the word ‘uncomment’ in the instructions below, that means remove the ‘#’ from the start of the line.

  • The maximum allowed connections is 1024 so we should change the worker_connections line to worker_connections 1024;
  • Uncomment the multi_accept line & change it to multi_accept on;
  • NginX will log every access to the server. If you don’t want huge log files you should turn this off. Change the access_log line to access_log off;
  • Uncomment server_tokens and change it to server_tokens off; to stop the NginX version number being sent out in errors & headers.
  • Change the number of seconds an idle connection will be closed after by changing the keep alive timeout to 10 like so keepalive_timeout 10; This will force an idle connection to close after 10 seconds.
  • Add the line client_max_body_size 16m; to allow for pages with lots of images.
  • Uncomment the gzip_vary line and change to gzip_vary on; to tell proxies to allow gzipped and regular files to be cached. This stops non-gzip capable clients trying to render gzipped files.
  • Uncomment the gzip_proxied line and change it to gzip_proxied any; to force all gzip to compress all proxy responses.
  • Uncomment the gzip_comp_level line and change it to gzip_comp_level 5; to give an optimal compression ratio while not adversely impacting CPU usage too much.
  • Uncomment the gzip_http_version line and change it to gzip_http_version 1.1; to ensure both http/1.0 & http/1.1 files are compressed.
  • Add the line gzip_min_length 256; next so we don’t try to compress files smaller than 256 bytes.
  • Finally replace the gzip_tipes line with the following to add missing MIME types.
gzip_types application/atom+xml 
     application/javascript 
     application/json 
     application/rss+xml 
     application/vnd.ms-fontobject 
     application/x-font-ttf 
     application/x-web-app-manifest+json 
     application/xhtml+xml 
     application/xml 
     font/opentype 
     image/svg+xml 
     image/x-icon 
     text/css 
     text/plain 
     text/x-component 
     text/javascript 
     text/xml;

This will make sure all the listed file types are compressed along with the html types.

Save your changes by pressing <ctrl-s> then quit nano by pressing <ctrl-x>. Now type the following into the terminal to test the integrity of your changes.

sudo nginx -t

If everything is ok type the following into the terminal to restart your server.

sudo service nginx restart
Next > Install PHP